- Python 79.4%
- JavaScript 11.4%
- HTML 6.2%
- CSS 2.7%
- Shell 0.1%
 1052dc5c7b
The span reference itself is generated from the registry, so this adds the prose the generated list cannot supply: how to actually see a span, what is deliberately never recorded, and where the instrumentation stops short. The "how to turn it on" part is the part people get wrong. Core installs no provider, so OTEL_TRACES_EXPORTER=console against a plain `datasette` process emits nothing at all - that variable is read by the SDK auto-configuration which only runs under `opentelemetry-instrument`. Documented as a warning because it reads like a bug when you hit it. Two more measured facts get the same treatment: the SDK's BatchSpanProcessor default schedule delay is 5000ms (checked, not assumed - `BatchSpanProcessor._default_schedule_delay_millis()` on opentelemetry-sdk 1.44), so nothing appears for five seconds; and without OTEL_SERVICE_NAME the default resource reports service.name=unknown_service. Privacy properties are stated positively rather than left implicit: SQL truncated at 2048 characters, parameter values never recorded, no actor identifiers, table names only from an explicit `table=` argument. The last of those is now documented on db.execute() itself, since it is public API. The limitations section claims only what was measured. An earlier draft said two traces per process are orphaned by the register_output_renderer and asgi_wrapper hooks; measuring it showed a default install emits zero spans from either, because Datasette queries no database there - it is a plugin that would produce the orphan. Corrected to say that. It also deliberately does NOT say an embedder must install its provider before Datasette's first span or get nothing. That claim is false: ProxyTracer._tracer returns the no-op tracer without caching it when no provider is set, so early spans are dropped and nothing is poisoned. The telemetry.py docstring said no-op spans "cost approximately nothing". The benchmark for this diff does not support a claim that strong - a table page emits ~58 spans - so it now states the measurement instead: median 9.80ms to 9.98ms across 15 runs, inside a 1.4ms run-to-run spread. Co-Authored-By: Claude Opus 5 <noreply@anthropic.com> |
||
|---|---|---|
| .github | ||
| datasette | ||
| demos | ||
| docs | ||
| tests | ||
| .coveragerc | ||
| .dockerignore | ||
| .git-blame-ignore-revs | ||
| .gitattributes | ||
| .gitignore | ||
| .isort.cfg | ||
| .prettierrc | ||
| .readthedocs.yaml | ||
| CODE_OF_CONDUCT.md | ||
| codecov.yml | ||
| Dockerfile | ||
| Justfile | ||
| LICENSE | ||
| MANIFEST.in | ||
| package-lock.json | ||
| package.json | ||
| pyproject.toml | ||
| pytest.ini | ||
| README.md | ||
| ruff.toml | ||
| setup.cfg | ||
| test-in-pyodide-with-shot-scraper.sh | ||








An open source multi-tool for exploring and publishing data
Datasette is a tool for exploring and publishing data. It helps people take data of any shape or size and publish that as an interactive, explorable website and accompanying API.
Datasette is aimed at data journalists, museum curators, archivists, local governments, scientists, researchers and anyone else who has data that they wish to share with the world.
Explore a demo, watch a video about the project or try it out on GitHub Codespaces.
- datasette.io is the official project website
- Latest Datasette News
- Comprehensive documentation: https://docs.datasette.io/
- Examples: https://datasette.io/examples
- Live demo of current
mainbranch: https://latest.datasette.io/ - Questions, feedback or want to talk about the project? Join our Discord
Want to stay up-to-date with the project? Subscribe to the Datasette newsletter for tips, tricks and news on what's new in the Datasette ecosystem.
Installation
If you are on a Mac, Homebrew is the easiest way to install Datasette:
brew install datasette
You can also install it using pip or pipx:
pip install datasette
Datasette requires Python 3.8 or higher. We also have detailed installation instructions covering other options such as Docker.
Basic usage
datasette serve path/to/database.db
This will start a web server on port 8001 - visit http://localhost:8001/ to access the web interface.
serve is the default subcommand, you can omit it if you like.
Use Chrome on OS X? You can run datasette against your browser history like so:
datasette ~/Library/Application\ Support/Google/Chrome/Default/History --nolock
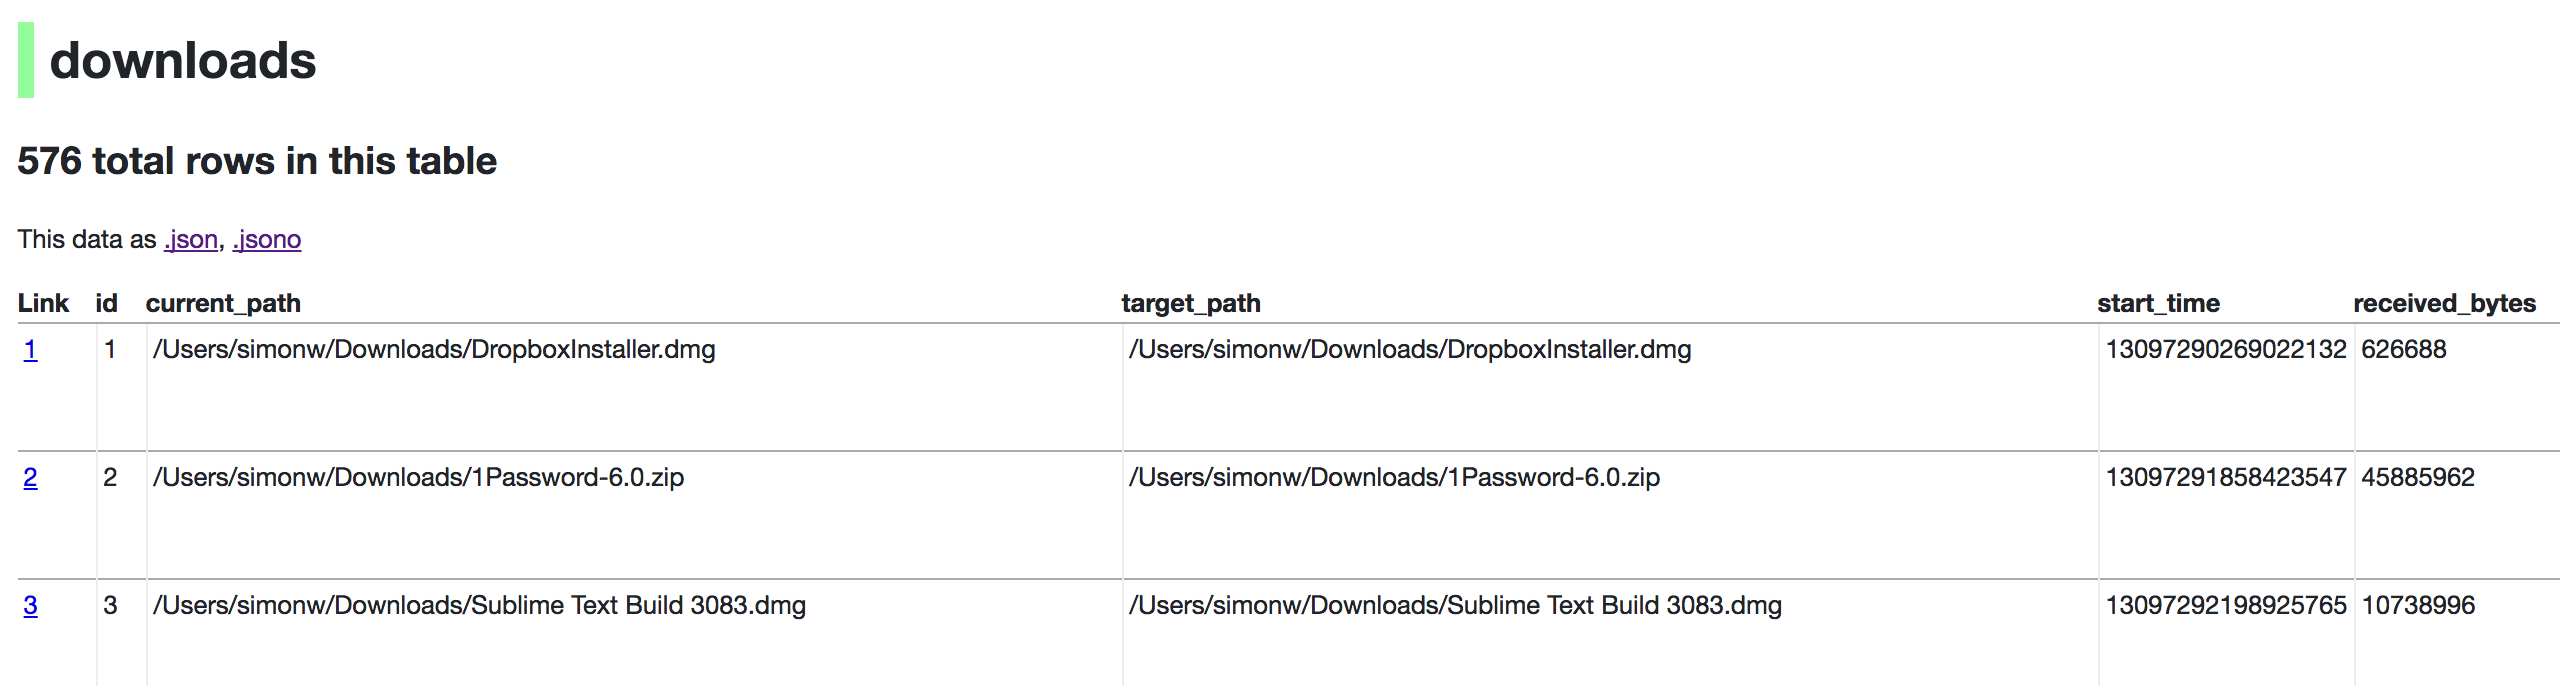
Now visiting http://localhost:8001/History/downloads will show you a web interface to browse your downloads data:
metadata.json
If you want to include licensing and source information in the generated datasette website you can do so using a JSON file that looks something like this:
{
    "title": "Five Thirty Eight",
    "license": "CC Attribution 4.0 License",
    "license_url": "http://creativecommons.org/licenses/by/4.0/",
    "source": "fivethirtyeight/data on GitHub",
    "source_url": "https://github.com/fivethirtyeight/data"
}
Save this in metadata.json and run Datasette like so:
datasette serve fivethirtyeight.db -m metadata.json
The license and source information will be displayed on the index page and in the footer. They will also be included in the JSON produced by the API.
datasette publish
If you have Heroku or Google Cloud Run configured, Datasette can deploy one or more SQLite databases to the internet with a single command:
datasette publish heroku database.db
Or:
datasette publish cloudrun database.db
This will create a docker image containing both the datasette application and the specified SQLite database files. It will then deploy that image to Heroku or Cloud Run and give you a URL to access the resulting website and API.
See Publishing data in the documentation for more details.
Datasette Lite
Datasette Lite is Datasette packaged using WebAssembly so that it runs entirely in your browser, no Python web application server required. Read more about that in the Datasette Lite documentation.