- Python 79.4%
- JavaScript 11.4%
- HTML 6.2%
- CSS 2.7%
- Shell 0.1%
 ba3756eb54
The two new tests span a datasette serve subprocess by hand: each found a free port with a copy of test_playwright.py's find_free_port, built its own subprocess.Popen call, polled with its own 15 second deadline loop, and tore the process down in its own finally block. That is the third and fourth hand-rolled copy of plumbing conftest.py already owns for ds_localhost_http_server and ds_unix_domain_socket_server. Move find_free_port into conftest.py and add a serve_with_plugins factory fixture that writes plugin sources to a temporary --plugins-dir, takes a free port, waits for the server to answer, and terminates every process it started when the test ends. wait_until_responds() grows an optional process argument so a server that dies during startup fails immediately with its captured output instead of waiting out the timeout, and now catches httpx.TransportError rather than only httpx.ConnectError - a superclass, so existing callers are unaffected. Two fixes beyond the deduplication: The marker test polls until its flag flips, which meant it would also have passed if the startup hook were re-run on the serving loop by the first-request fallback - the exact bug it exists to catch. That cannot happen while invoke_startup() is idempotent, but nothing said so. The plugin now counts startup calls and the test asserts it ran exactly once, so removing that guard fails the test loudly instead of quietly turning it into a no-op. test_startup_error_fails_fast_before_port_binds passes on unmodified main, where startup already ran ahead of uvicorn.run(), so it is a characterization test rather than a regression test for this commit; its docstring now says so. Its loop re-checking that nothing was listening ran about one iteration before the process exited, and could not distinguish a pre-bind failure from a port nothing ever touched, so it is replaced by a single check with a comment about what it does and does not prove. Verified the red side is preserved: the marker test still fails on unmodified main, now in 3.7s rather than 15.2s. Co-Authored-By: Claude Opus 5 <noreply@anthropic.com> |
||
|---|---|---|
| .github | ||
| datasette | ||
| demos | ||
| docs | ||
| tests | ||
| .coveragerc | ||
| .dockerignore | ||
| .git-blame-ignore-revs | ||
| .gitattributes | ||
| .gitignore | ||
| .isort.cfg | ||
| .prettierrc | ||
| .readthedocs.yaml | ||
| CODE_OF_CONDUCT.md | ||
| codecov.yml | ||
| Dockerfile | ||
| Justfile | ||
| LICENSE | ||
| MANIFEST.in | ||
| package-lock.json | ||
| package.json | ||
| pyproject.toml | ||
| pytest.ini | ||
| README.md | ||
| ruff.toml | ||
| setup.cfg | ||
| test-in-pyodide-with-shot-scraper.sh | ||








An open source multi-tool for exploring and publishing data
Datasette is a tool for exploring and publishing data. It helps people take data of any shape or size and publish that as an interactive, explorable website and accompanying API.
Datasette is aimed at data journalists, museum curators, archivists, local governments, scientists, researchers and anyone else who has data that they wish to share with the world.
Explore a demo, watch a video about the project or try it out on GitHub Codespaces.
- datasette.io is the official project website
- Latest Datasette News
- Comprehensive documentation: https://docs.datasette.io/
- Examples: https://datasette.io/examples
- Live demo of current
mainbranch: https://latest.datasette.io/ - Questions, feedback or want to talk about the project? Join our Discord
Want to stay up-to-date with the project? Subscribe to the Datasette newsletter for tips, tricks and news on what's new in the Datasette ecosystem.
Installation
If you are on a Mac, Homebrew is the easiest way to install Datasette:
brew install datasette
You can also install it using pip or pipx:
pip install datasette
Datasette requires Python 3.8 or higher. We also have detailed installation instructions covering other options such as Docker.
Basic usage
datasette serve path/to/database.db
This will start a web server on port 8001 - visit http://localhost:8001/ to access the web interface.
serve is the default subcommand, you can omit it if you like.
Use Chrome on OS X? You can run datasette against your browser history like so:
datasette ~/Library/Application\ Support/Google/Chrome/Default/History --nolock
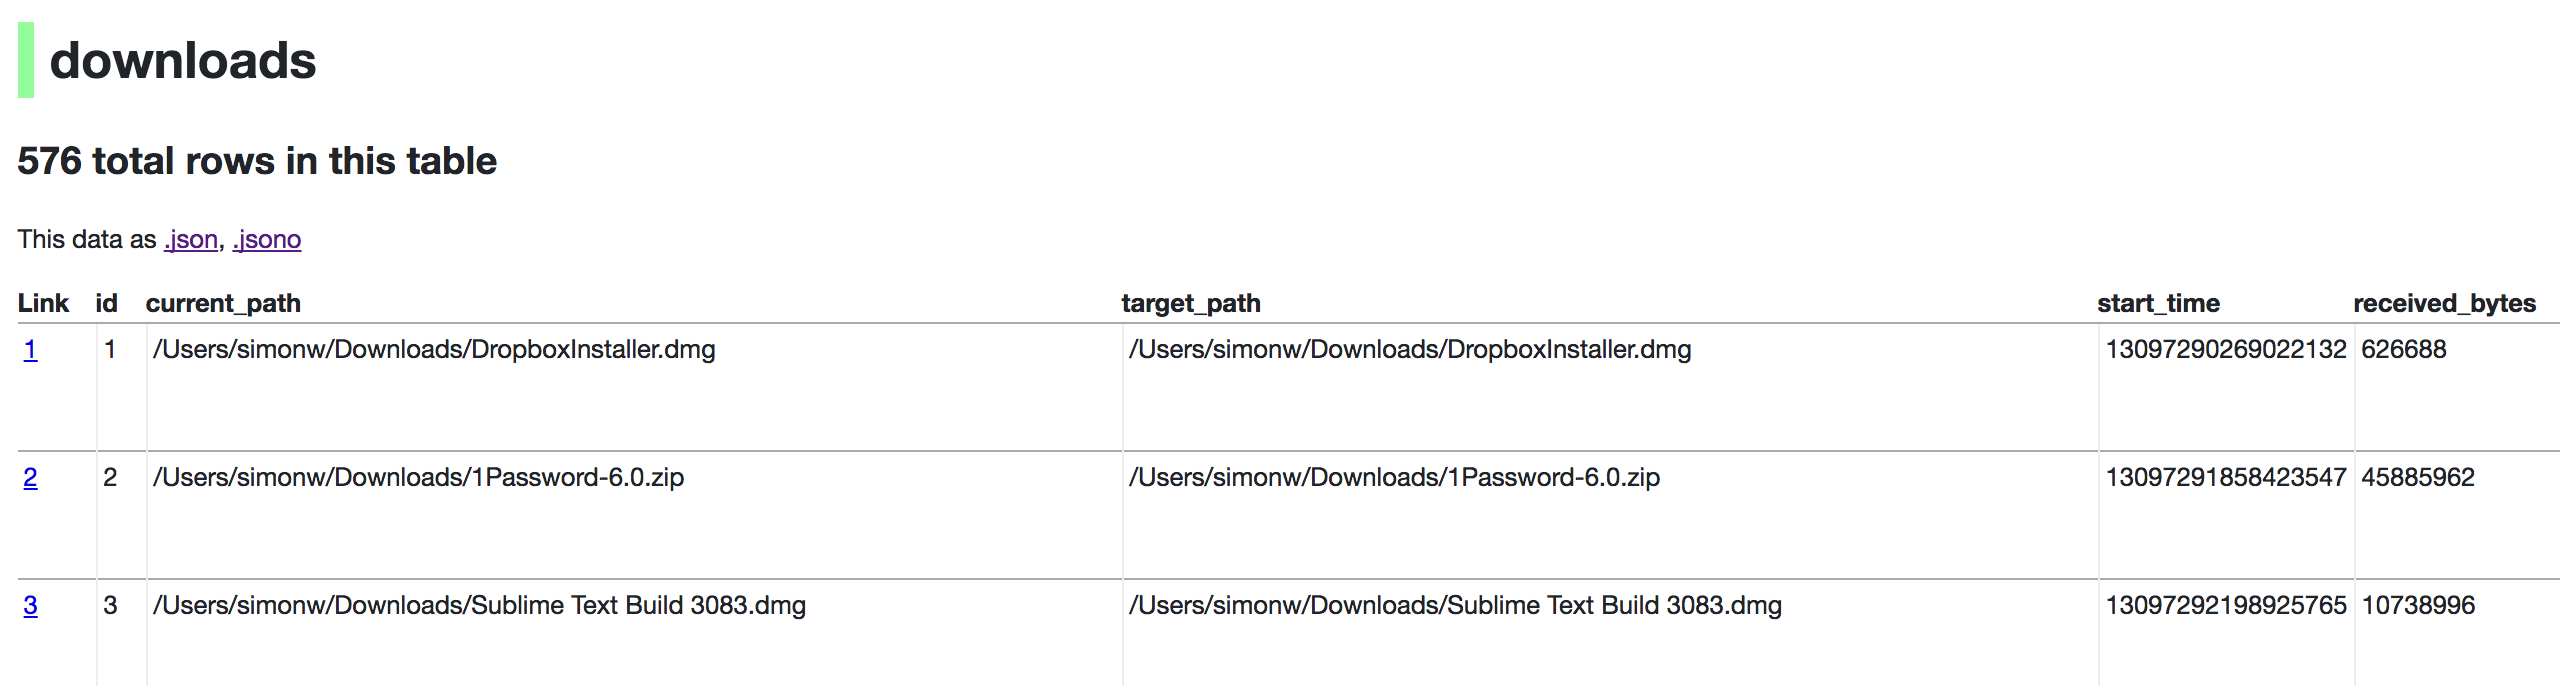
Now visiting http://localhost:8001/History/downloads will show you a web interface to browse your downloads data:
metadata.json
If you want to include licensing and source information in the generated datasette website you can do so using a JSON file that looks something like this:
{
    "title": "Five Thirty Eight",
    "license": "CC Attribution 4.0 License",
    "license_url": "http://creativecommons.org/licenses/by/4.0/",
    "source": "fivethirtyeight/data on GitHub",
    "source_url": "https://github.com/fivethirtyeight/data"
}
Save this in metadata.json and run Datasette like so:
datasette serve fivethirtyeight.db -m metadata.json
The license and source information will be displayed on the index page and in the footer. They will also be included in the JSON produced by the API.
datasette publish
If you have Heroku or Google Cloud Run configured, Datasette can deploy one or more SQLite databases to the internet with a single command:
datasette publish heroku database.db
Or:
datasette publish cloudrun database.db
This will create a docker image containing both the datasette application and the specified SQLite database files. It will then deploy that image to Heroku or Cloud Run and give you a URL to access the resulting website and API.
See Publishing data in the documentation for more details.
Datasette Lite
Datasette Lite is Datasette packaged using WebAssembly so that it runs entirely in your browser, no Python web application server required. Read more about that in the Datasette Lite documentation.